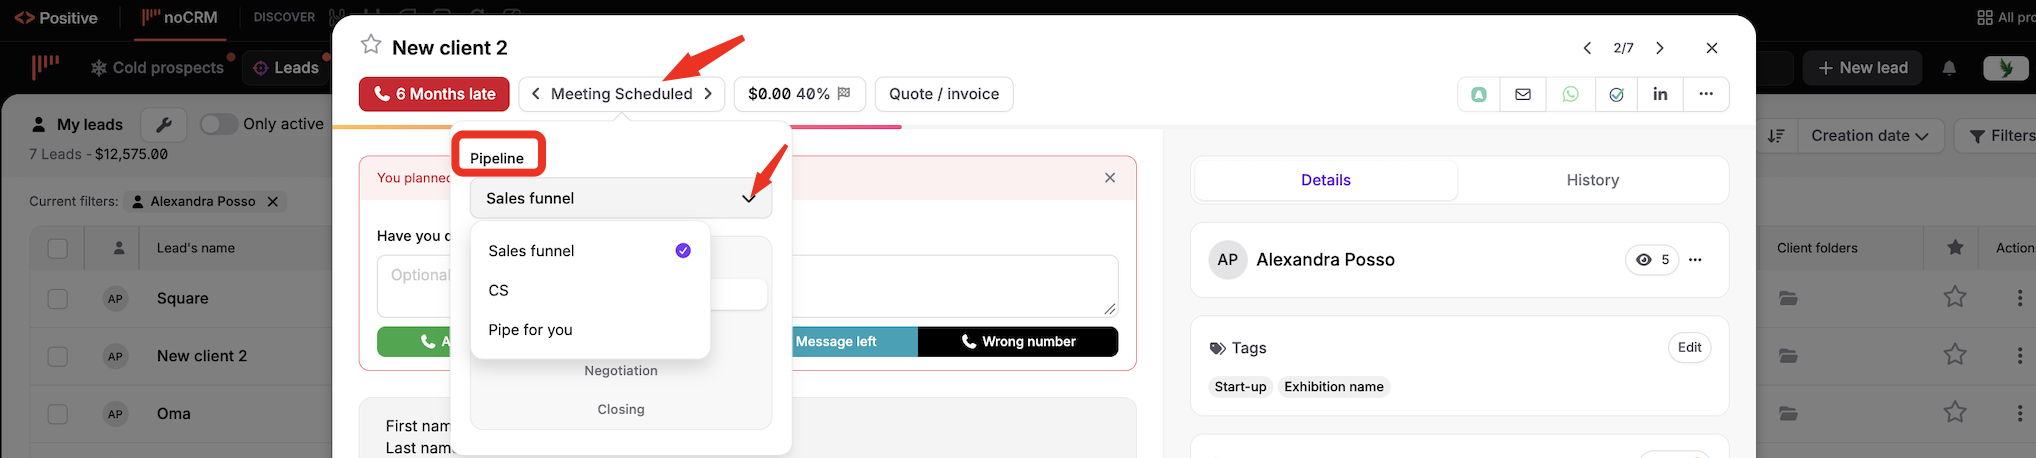
Create several pipelines when your sales process differs from one product, service or market to another. Each pipeline has its own steps.


Click your avatar at the top right.
Click Admin panel.
Under Sales process, click Pipeline steps.
Click Create a new pipeline, enter a name and click Create. The page of the new pipeline opens.

Enter the name of the first step and click Save. Repeat for each step. To add a step later, click Add a step. For more details, see How do I set up my sales pipeline?
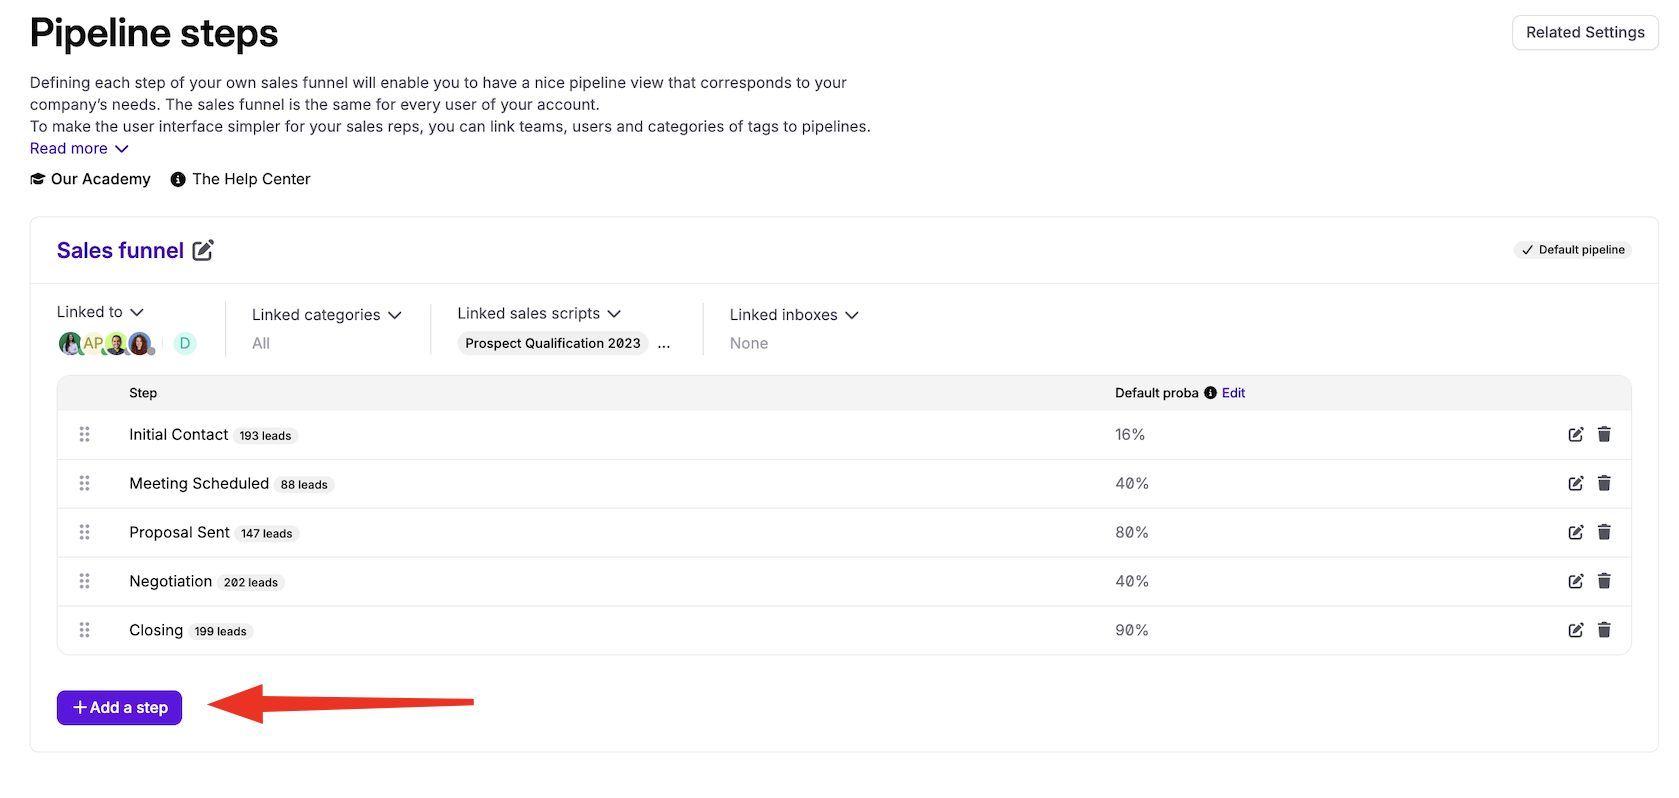
To set the default pipeline, open the pipeline (click its name, or ⋮ then Edit) and click Set as default pipeline.
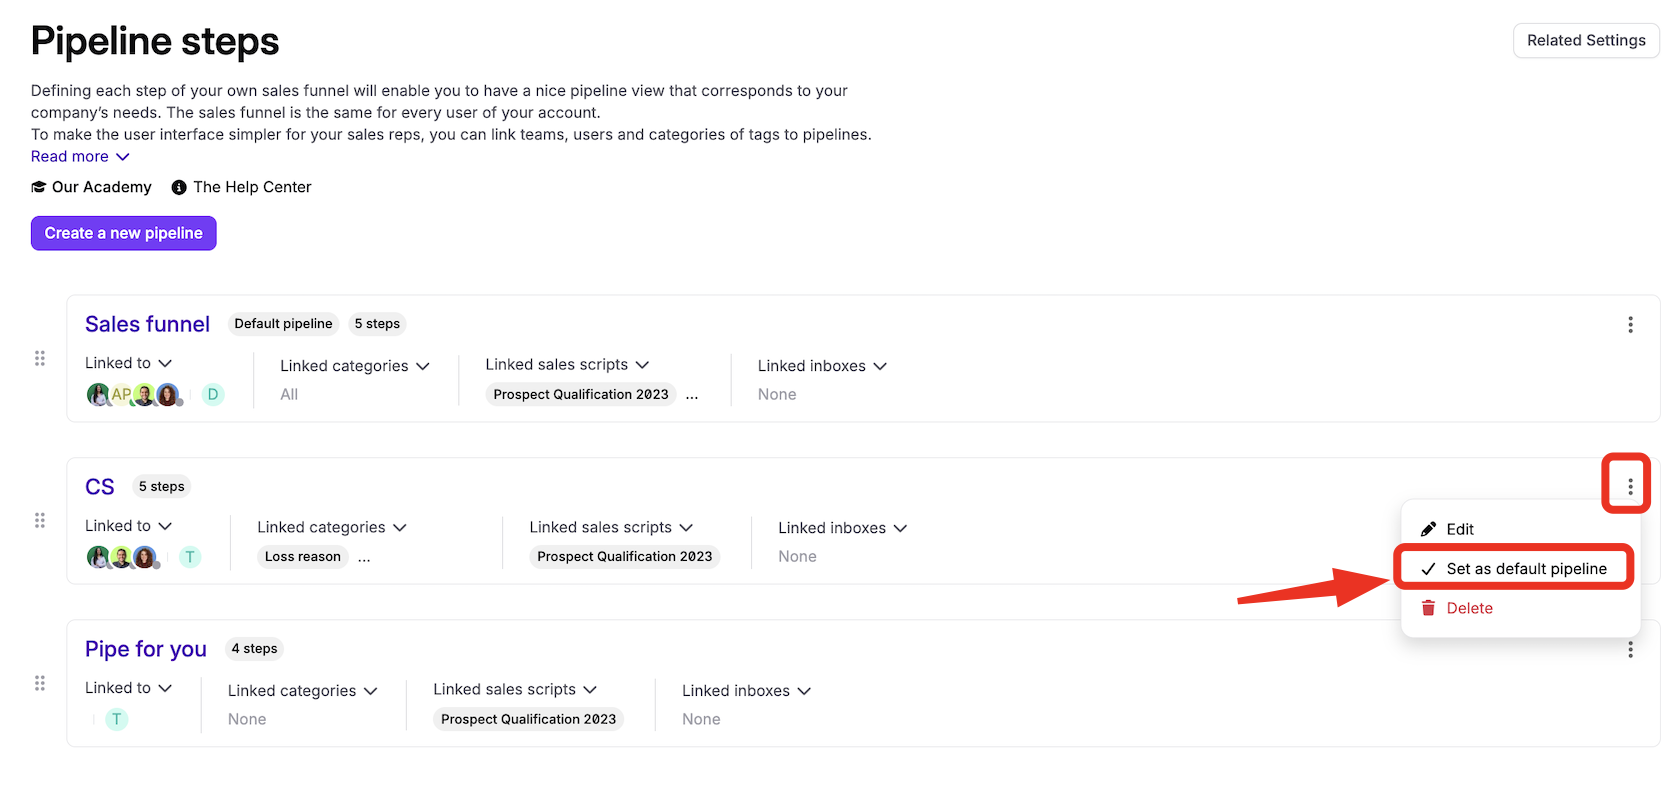
To change the order of your pipelines, drag and drop their cards.
Each step must be unique inside a pipeline, but you can use the same step in several pipelines.
To delete a pipeline, first move its leads to another pipeline or delete them. Then open the pipeline and click Delete. You can't delete the default pipeline: first set another pipeline as the default one, and the Delete option appears again. If noCRM says the pipeline still contains leads that you can't see, check your filters.

To have the same lead in two pipelines, duplicate the lead.
When you create a lead from an email or from your contact form, add #step: nameofstep. The lead goes to your default pipeline, and you can then move it to another pipeline.
When you create a lead from a prospecting list, choose the pipeline. The lead goes to the first step of that pipeline.
Click Leads in the top bar, then Pipeline view, and choose the pipeline to display.
In the pipeline view, you can also use the drop-down menu at the top left of the page.

Open the lead.
Click the button that shows its step.
In the Pipeline drop-down menu, choose the pipeline.
Choose the step.